
After years of talking and thinking about it, we are finally giving much of the house a face lift by painting walls, trim, doors, cabinets, and updating all of the fixtures from brass to brushed nickle. This is all made possible by my parents, who are providing the vast majority of the paints and materials, as our Christmas present, as well as doing a great deal of painting themselves. Thanks mom and dad!
The one room in the house that needed the most work is the kitchen. The walls look awful, with their shade of builder's grade beige, and the cabinets are dirty showing their age! I decided that painting the cabinets, and updating the hardware, would go a long to way making the kitchen look newer and more updated, especially given the fact that our appliances do not match and our countertop is an ugly shade of hunter green.
The process itself made me nervous and caused me to research everything I could find about painting cabinets. There are so many different blogs (I'm now adding to that list) and DIY websites to peruse, that it can be overwhelming. Rest assured that I have done my research, talked with guys at Sherwin Williams, and now completed the task. What I will share is not an expert opinion/advice, but from this DIY diva's own experience.
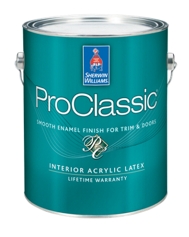
I took off one of the cabinet doors and took it to Sherwin Williams to ensure that I was buying the correct paint and products. Our cabinets were painted in a latex semi-gloss paint. This information was crucial to the success. Below, I have made a list of supplies that you will need if you would like to conquer your kitchen, as well as the many questions that I had about what products to use and how to use them. Make sure that you set yourself up a work area with sawhorses, old towels, a tarp, newspaper, or whatever else you choose to make less of a mess and allow for easier cleanup. I also used paint cans to prop up the many doors and drawers.
Materials Needed
- Saw Horses/Work Area
- Sander Deglosser and Splash-Free Safety Goggles
- Sandpaper-a variety of grits for different tasks. (electric hand sander for big sanding jobs)
- Paint-Oil or Latex, whichever you prefer. (Latex dries faster, but Oil will hold up better. I used latex)
- Caulk
- Paint Brush
Q&A
- Do I need to sand? Not necessarily. I first cleaned the cabinets to ensure that no food residue was present. I then used a product called sander deglosser. I wiped down all of the cabinet doors, as well as the cabinets themselves, with this product. It will take the gloss off of the cabinets and allow the new paint to stick, without actually having to sand. Our cabinets were brushed, as opposed to sprayed, and there were drip marks, so I used small pieces of sand paper to smooth out the drip marks on the sides. I also used the electric hand sander to sand down parts of the doors that had rolled up, due to water damage, as well as to remove the marks left by the hardware, I only had to do this for about three doors and two drawers in the entire kitchen.
 |
This is the type of sandpaper I used when I needed to rough-up areas. I used a 320 grit when I just need to smooth less noticeable areas.
|

 |
- What do I use to paint the cabinets and cabinet doors? I read, was told, and tried a variety of methods for painting the cabinets and doors and, after trial and error, found the best and easiest way to do this. *Disclaimer-spraying the cabinets and doors will give the best and most professional finish.* I bought foam rollers and a purdy (really nice) brush and did not like the results. The high density foam rollers left air bubbles and the really nice brush left too many brush strokes. I happened to read, after trying the previous to methods, about using foam brushes...yes, the same one you can get in the craft section at Walmart. I actually bough an economy of 12 brushes, I believe, in the paint section at Walmart. They come in a variety of sizes, three of which are pictured below, and are super cheap. These are what I ended up using! They worked wonderfully and left very minimal strokes.

- Do I need to buy new hinges? I decided against buying new hinges and instead spray painted what I already had. It worked well and turned out great! And, best of all, this one can of spray paint cost less than $4 and is all I needed for every hinge and screw in the entire kitchen.

- How do I cleanup and paint spill? If you are using latex paint, acetone is what you will need. Oil-based paint requires paint thinner/mineral spirits. I used latex paint, so this is what I used. It was easy to use and took off the paint on the floors with no problem. MAKE SURE TO WEAR SPLASH-FREE SAFETY GOGGLES...I know from experience the burning that will ensure if you do not!

My Process
Figuring out the best way to paint the doors/drawers, reattach the hinges, add new handles, and rehang the doors/drawers took lots of trial and error. I first painted the backs of the doors. I painted two coats of paint of the front and back of each door, and allowed at least 3-4 hours dry time. Even though they were good and dried when I flipped them over to paint the front, they still stuck to the sawhorses and paint cans, causing me to have to re-sand and re-paint them...ugh! So, I wised up and found a better way to do this!
For the next set of doors, I painted the back side with two coats, again allowing 3-4 hours dry time between coats, and then reattached the hinges and hung the doors back on the cabinets. I left the doors open and carefully painted the front sides after attaching. I left the doors open overnight to ensure that the painted was nice and hard before I closed the doors. While this did create more of a mess in the kitchen, it kept the doors from sticking to the sawhorses or paint cans. I'm sure that there is a better way to achieve this goal of now sticking, but this is what worked foe me!
After now conquering this task of painting our kitchen cabinets, I can say that I am so glad that I did it! It is not for the faint of heart, and is quite time consuming (I would say a solid week from start to finish, because of having to allow everything to dry) , but it gives a great and updated look to a kitchen for the fraction of the cost of purchasing new doors, or new cabinets all together.


 |
| One side of the kitchen completed. |
No comments:
Post a Comment